


Here in Northern California it is hard to know for sure what season it is. We have had perfect spring weather most of the last 3 months then this afternoon it took a definite turn back to winter. So when it gets windy, cloudy, and cold outside what does a crafty soul do? She crafts a cheery Spring Wreath! Ok, ok, cold is a relative term but when you go from mid 70’s to the low 40’s in 24 hours it feels dang cold.
I’ve always been a fan of wreaths. There is something about the never ending circle that opens up endless possibilities… so when I was looking at my somewhat bare looking wall I felt like it was crying out for a wreath. I started to play around with some things I had bought recently to see what I could come up with to fill in the big gaping hole on my wall and this is what I ended up with.

Here are the things you need:
1 14” Straw Wreath
2 About one half yard fabric
3 Some straight pins and/or greening pins
4 Some coordinating ribbon
5 Some seasonal silk flowers and picks
6 A picture hanger


Step 1. Prepare the Fabric
Cut or tear the fabric into 3 inch strips. I tore the fabric because I like the look but you could use pinking shears or a rotary cutter as well.
Sew the strips together along the short ends to form one long strip.

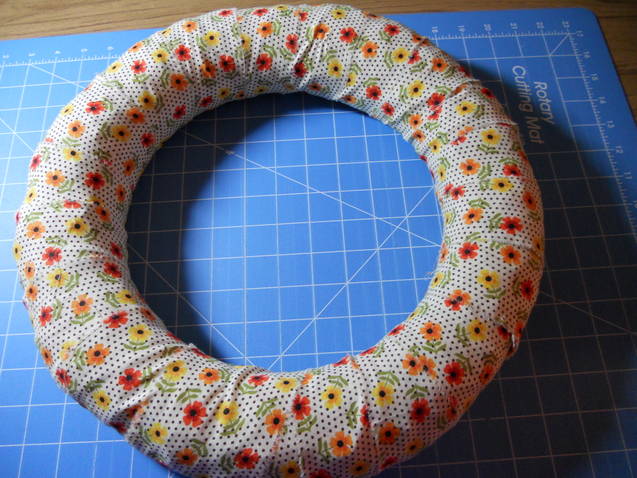
Step 2. Cover the wreath with the fabric.
Starting on the back side of the wreath pin one short end of the fabric to the wreath at a slight angle and begin to wrap the fabric around the wreath.


Keep the fabric tight and wrap at an angle overlapping the fabric about ½ inch as you wrap.


Step 3 . Attach Ribbon
Beginning on the back side, attach the ribbon to the wreath using a pin. Be sure to angle the ribbon a little more sharply than the fabric.

Wrap the ribbon around the wreath at an angle leaving approximately 3 inches between the wraps.

Secure the ribbon on the back side with another pin.

Step 4. Finish up
Start by by attaching the picture hanger….just a quick note, I used a sawtooth picture hanger that can be easily pushed into the straw wreath. You could also use a greening pin.

Next attach the silk flowers and picks using greening pins. I found these really cool flowers the have clips on the back side so I can easily change the flowers for roses in the summer and sunflowers in the fall without having to totally reinvent the wreath.


Now we have come full circle and you can hang your completed wreath and cheer up a dreary day.
.jpg)


No comments:
Post a Comment