


Memorial Day is one of my
favorite holidays for several reasons. First,
it brings to mind all the freedoms we enjoy thanks to our military men and
women who have served so long and done so much for us. We can never thank these brave and courageous
souls enough. Second, traditionally this
weekend officially begins summer. Who
doesn’t love summer? Third,
but not necessarily least, there is no pressure attached! No stress, no list of people to buy presents
for, no cookies to bake, no major shopping trips, no long drives or traveling
(unless you choose to). I LOVE this holiday.
In
years past I would drag out tubs of decorations with every new season, holiday,
birthday, or other event. I was always
taking down and putting up decorations.
Now…Not so much. I just switch
out a few things here and there to add a little flavor of the season. I try to
make these changes last over three to four months. HA! Another reason to like Memorial Day! These decorations also cover June (Flag Day)
and July
(Fourth of July).

This
quick and easy no sew wreath will add pop and sizzle to your summer decorations
and really doesn’t take much time or money.
ALWAYS check your stash before you go shopping. I didn’t have to buy anything for this
project because I had everything on hand either left over from another project
or purchased when it was on sale.
You need:
- 1 Straw
Wreath
- 1/2
yard of patriotic fabric in two coordinating colors
(approximately)
(approximately)
- 1
1/2 yards matching ribbon
- Lots
of small straight pins.

Step 1: Cutting FabricCut
your base fabric into 3 inch strips across the width of the fabric. I tear my strips because I like the ragged
edge look but you can use a rotary cutter also.
You need about 6 strips.
Cut
or tear your ruffle fabric into 3 inch strips.
You will need about 3 strips.
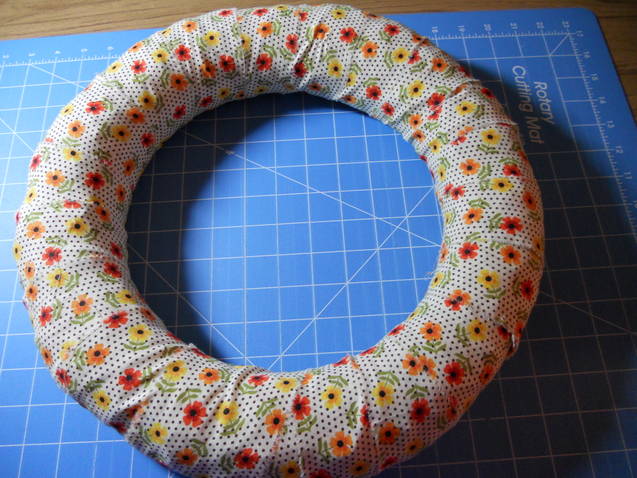
Step 2: Wrapping WreathSecure
the first strip of your base fabric to the back side of the wreath using pins.
Frugal Note: This is a good place to use those bent pins you
generally throw away.

Continue
wrapping the fabric around the wreath at an angle making sure you over lap the
edges about 1/2 inch until the wreath is covered. Secure fabric strips with pins as you add
them on.

Step 3: Attaching Ruffled
Edge
Using
the contrasting fabric strips, begin attaching a soft pleated ruffle to the
back side of the wreath. Fold over the
narrow raw edge and secure with a pin just at the outside edge of the
wreath. I use the width of my thumb
nail as a guide to keep the pleats even.
Secure each pleat with a pin.

To
add a strip of fabric, about 1 inch from the end of your first strip fold a
soft pleat back toward the previous pleats, fold the end in to the middle. Sandwich the next strip of fabric inside this
pleat then secure with a pin.

Continue
pleating until you have gone around the entire wreath. You can stop here and tie the ribbon hanger
onto the wreath for a minimalist look or add a simple embellishment. I happened to have a cute little wooden star
banner so I attached it with pins.

I hope you enjoy
Memorial Day weekend as much as I plan to.
Please leave a comment and share your thoughts on this wonderful holiday!
Linking up:


.jpg)
Linking up:




.jpg)


